Friday, October 31, 2014

The Purge: My Dresser

I love organizing, but that love has never extended to my dresser. I think it's because I know a lost-cause when I see it. The issue is I have annoying attachments to things in there, and so items always stay – leading to drawers stuffed full of clothes that are impossible to open.


So I figured, why not start with the dresser now before the thought of organizing makes me stabby.

Drawer 1
My earring drawer was an easy place to start, because it always stays organized (thank you ice cube trays for giving me a place to put everything).


Drawers 2 & 3
These two drawers contain necklaces, rings, bracelets, "fancy" jewelry and jewelry boxes. 

I was amazing at how much I either didn't want or needed to relocate.


The items in these two drawers rarely get used, which made me question why I'm giving it two drawers. So I decided to consolidate, and give the extra drawer to my tank tops, which I use most days. (All my tank tops are waiting to be washed, so that drawer is enpty at the moment).


Drawer 4 and 5
These are my undergarments drawers. Let's just trust that I went through them.

Drawer 6
This is myAshley fail. I forgot to take a before of my workout clothes drawer. This is the drawer all my tank tops are usually in though, which freed up a lot of space – so I decided to move my sports bras here.


Drawer 7
I only wear socks on 3 occasions: 1. when I'm in bed and my feet are cold; 2. when wearing boots; 3. when it snows. Yet, here is my overflowing sock drawer.

My really gross sock drawer. I had no idea how many pilly and faded socks I owned (probably because I rarely wear them). I got rid of a bag full of socks.

Even more baffling, I had 6 pairs of hospital socks in my drawer. Apparently, I'm subconsciously keeping them as mementos from all my exciting ER visits. (And if you're counting, yes I know there's only 5 in the picture, but I found another about 30 minutes later in my PJ drawer...yeah, no idea).

I decided to keep my yellow ones, because they make me giggle. The summer after my heart diagnosis, I was hospitalized with pneumonia – I had Brent go home and pack me a bag and requested my yellow hospital socks, because the beige ones provided were ugly. Soon after, the hospital staff started freaking out when I was walking on my own. Come to find out that yellow socks is their code for fall risks. Oops.

Anyway, all 5 beige hospital socks are now with my grandma, who is rather excited about my donation. And I'm excited about my new, spacious sock drawer.


Drawers 8 & 9
This is Drawer 8, PJ pant drawer, which usually contains extra t-shirts that can't fit into Drawer 9. This leads to everything in the drawer being extra wrinkly.

And this is my overflowing t-shirt drawer.

I had t-shirts I wore when I was pregnant and t-shirts I wore when I was several sizes smaller in there – yep, time to say goodbye.


My new just PJs drawer:


My new t-shirt drawer:


I know I have a long ways to go in my purge, but just having this one thing done feels so amazing. I can't wait to do more.

Happy Halloween!


Thursday, October 30, 2014

The Office: new artwork

I spend roughly 40 hours in my home office now. I became tired of the red accents after, oh, one hour. Red was fine when this room was mainly Brent's office, and I didn't have to spend much time in here. Red is just too harsh of a color for a creative space. And with yellow being my favorite color, it was an easy decision to make.

So on to my first de-redding  project: the artwork above my desk.

While I loved this painting and did consider painting over the red – the canvasing is bowing and well, it just wasn't going to happen.

(Please note, this picture is from my office redo in 2010. The current state of my office is nowhere close to this clean and organized).

So I bought a canvas the same size, some painter's tape and yellow paint...and envisioned a basketweave and tada:

Step 1: I painted the entire canvas white. I know it sounds silly painting a white canvas white, but when it comes time for touch ups, you wants the whites to match.

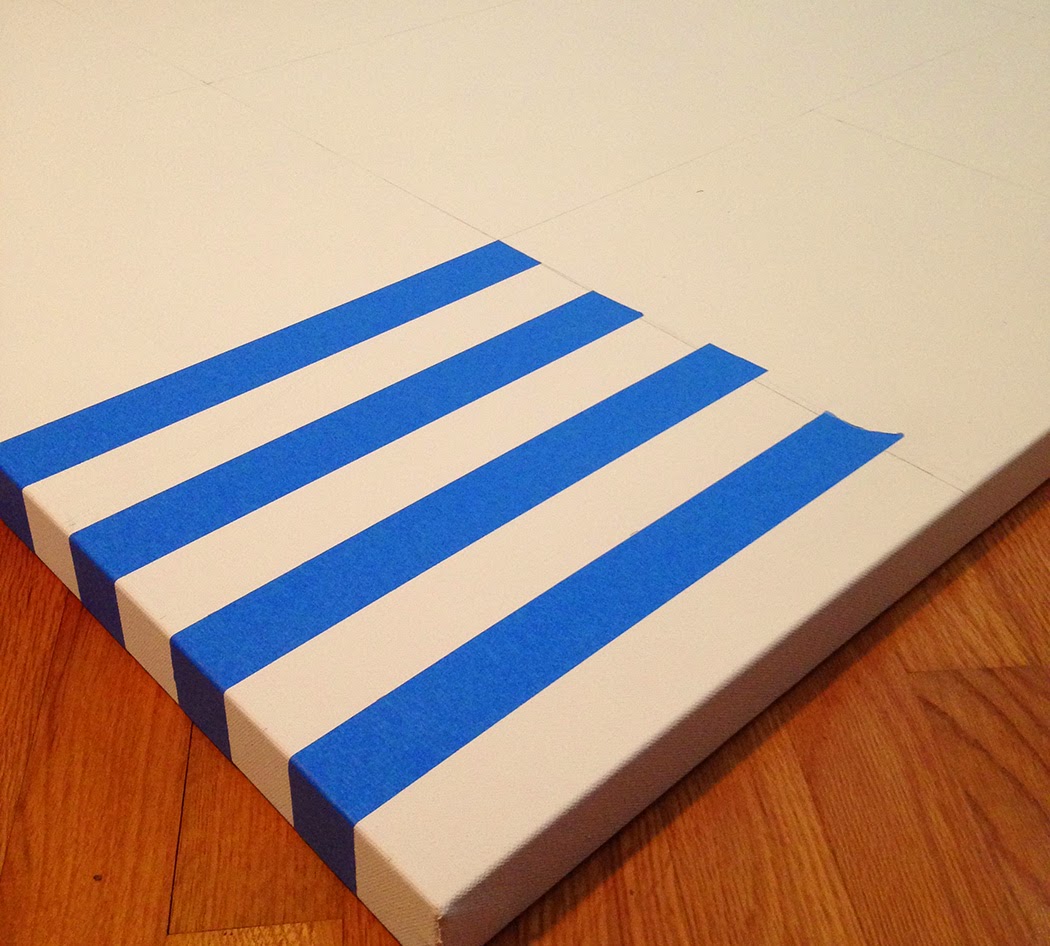
Step 2: I made a grid. This was the most annoying part of the project, as math hurts my head. While the big 4x3 grid was easy enough to determine with a 48"x36" canvas, the lines inside the grid were where it got tricky - as 1" wide painters tape wasn't existing at Home Depot. So I used 1.41" wide tape and did math.


Step 3: I started taping:

Audrey even got a picture of me in the act:


Step 4: I finished taping and wished I choose blue for my office, so I could be done.

Step 5: Start painting and also start seeing spots from starring at bright yellow for several hours.


Step 6: Do touch ups.

Step 7: Done!

I'm really happy with how it turned out. I think it will be a fun visual for my new office.

The Start

It started with the office. I woke up one morning and thought "what am I doing?"

I've been working from home for almost a year now, and yet I never merged my former cube into its new home. (Plus my Memeboxes were taking up valuable closet real estate).

And that's when I really started seeing the rest of my house. While everything worked great pre-Audrey, post-Audrey I can't just glide by and expect the same results. On top of acquiring 4 more years of things, kid's stuff takes up a criminal amount of room.

My house no longer felt like home. It just felt like one giant mess.

The lack of space hit a critical level this summer, when we officially ran out of storage room in the basement, and things started piling up in our living space. I'll be honest, since having Audrey – my house has been at a standstill...and it's time for a change.

So, I would like to welcome you to my new focus: decluttering my life.


One project at a time.

Thursday, October 9, 2014

It's starting

I'm back! And something is going down in the office.

My lovely trash/recycling pile:

I still have yet to decide if this stash is impressive or horrifying.

Monday, October 6, 2014

Memebox: My Honey Box

I entered the Memebox world 2 weeks after the first Honey box sold out. I am obsessed with honey, and was beyond upset about this. I even tried buying all the items in the box on my own, but with some of small-brand South Korean products – I only found 2 of the products.

So when Memebox released its latest My Honey Box, I was so excited and ordered it in about 2.5 seconds. My box just arrived, so I haven't tried any of the products yet – but I am SO thrilled about everything in it.  :)


1. MIGABEE Antipollution RE-Peeling, 100 ml
Full size product: 100ml ($37)


Product Description: This is a pell-off type of facial pack enriched with natural ingredients renown for nourishing and brightening effects – honey, bee venom, propolis, royal jelly. It'll work to exfoliate dead skin cells, blackheads, and whiteheads and to control excess oil and sebum by maintaining the skin clean and well-balanced.

How to use: Spread the pack adequately over your face. The texture will be sticky and honey-like at first but it'll quickly start to dry off according to the skin temperature. Remove when it's completely dried off.


2. Mi Click Manuka Honey Treatment, 30 ml
Full size product: 30 ml, ($5)


Product Description: Enriched with high concentrates of honey, the Manuka Honey Treatment delivers nourishment, repairs damaged ends, and provides an intensive protein care to your dry hair. The natural manuka oil infused also works to renew damaged cuticles and restore silky gloss to your hair.

How to use: Towel-dry after shampooing. Take an adequate amount on your palms and softly massage it in throughout your hair. Rinse off after 5-10 minutes.


3. Enesti Apple & Honey Shea Butter Hand Cream, 50g
Full size product: 50g ($5)


Product Description: The heavily nourishing honey and vitamin-rich apple formula of this hand cream works to moisturize, purify, and firm up dry hands.

How to use: Apply the hand cream generously over your hands as often as possible.


4. From Nature Multi Effect Collagen Honey Mask, 1 each
Full size product: 1 each ($1)


Product Description: Containing high concentrates of real honey and collagen extracts, this nourishing Honey Mask delivers deep nutrition and improves skin elasticity by creating a protective moisture barrier over your skin. Plus, this mask is packed with over 9 different herbal ingredients for soothing and brightening up the overall complexion.

How to use: After toner application, spread the mask sheet over your face. Rest for 15-20 minutes, remove, and pat in the remaining essence for full absorbance.


5. EDMONG Honeybee Water Cream, 50 ml
Full size product: 50 ml ($29)


Product Description: Enriched with honey extracts, natural spring water, propolis extracts, aloe vera water, hyaluronic acid, and green tea extracts, this Honeybee Water Cream is a fast-absorbing moisturizer which strengthens the skin's natural restorative properties. It's free of paraben, artificial coloring, mineral oil, benzophenone, BHT, talc, etc.

How to use: At the end of your daily skincare routine, apply the cream evenly over your face and massage it into the skin for full absorbance. It can also be used as an overnight sleeping pack.


6. DAYCELL Essential Honey Lift Massage Cream 150ml
Full size product: 150ml ($20)


Product Description: This is the perfect solution for dehydrated, sagging skin. When gently patted onto the skin, the natural honey and collagen complex of the massage cream delivers deel nutrition and firms up the skin elasticity by creating a tight-knit gel network on the skin. Plus, its unique honey-like, gooey texture glides smoothly and absorbs deeply into the skin.

How to use: Take an adequate amount in your palm and massage it over your face as if patting the product into the skin. Gently roll it on the skin until everything's absorbed. Rinse off the next morning.


7. Pure Smile Snail Lip Treatment in Honey, 10g
Full size product: 10g ($5)


Product Description: Enriched with honey extracts, snail mucus extracts, grape seed oil, shea butter, and many more naturally-derived nutrients, Pure Smile's Lip Treatment moisturizes, nourishes, and protects dry, chapped lips.

How to use: Apply a small amount of the lip treatment over your lips. It's especially recommended to be used overnight for an intense lip care.