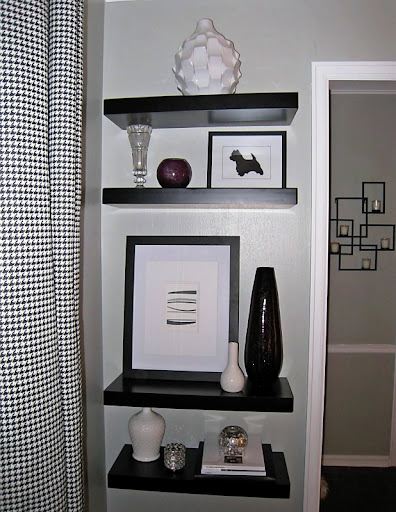
I have been using the same buffet "after" photo for what feels like forever. This wouldn't be a bad thing if my after photo was actually an after.
So to prove I do actually have candles in my candleholders, here you go:
Sunday, February 28, 2010
The Upstairs – Chapter 6 (the third bedroom)
Brent's and my weekend plans consisted of watching basketball, catching up on SVU, going to a neighbor's open house and ripping up the carpet in the new R.O.C. room (aka: Room of Crap, the former office, the one-day future nursery).
Once again we were mega lucky on the floors being in great condition, which will not be the case in the hallway – those will be in similar condition to the stairs. Ugh.
Before:After:
I think these before and after photos show demonstrate something people don't always seem to understand – golden hardwoods can brighten up a room better than beige carpet any day. Why? Because orange is the brightest color, and with these beautiful hardwoods, the orange shines through. Okay, lecture over. :)
As for the rest of the plans for this now third bedroom, I don't have many aside from painting the trim and the doors. So, you know, just like what I'm doing in the rest of my house.
(Oh, and if you're curious what the white dotes are – that's where the floating shelves were in this room).
Saturday, February 27, 2010
DIY Show Off
Thank you Roeshel for featuring me today on the DIY Showoff. I absolutely love your blog.
For those of you who found my blog from the DIY Showoff, welcome! My style is contemporary/modern glam, which is definitely different than most blogs out there. My 2 current big projects right now are my living room and office. So feel free to look around and thanks for browsing. :)
Friday, February 26, 2010
Crate & Barrel Outlet deals
Marimekko Towels – $2.95 to $19.95 (originally $4.95 to $34.95)
Geometry Print – $14.95 (originally $49.95)
Matilda Vase – $14.95 (originally $29.95)
Meridian Mirage Indoor-Outdoor Pillow – $12.95 (originally $24.95)
Bexley Teal Throw – $29.95 (originally $49.95)
Geometry Print – $14.95 (originally $49.95)
Matilda Vase – $14.95 (originally $29.95)
Meridian Mirage Indoor-Outdoor Pillow – $12.95 (originally $24.95)
Bexley Teal Throw – $29.95 (originally $49.95)
Thursday, February 25, 2010
The Budget
Well, it looks like my budget-friendly blog, will be getting even friendlier. For the second time in 2 years, my company is being acquired by a larger company. The actual transition won’t be until later this year, so I will have guaranteed job security until then.
While I’m not overly concerned at this point – I know Brent and I won’t end up in a cardboard box somewhere – it’s time to start thinking a bit more practically about spending habits. Does this mean I’m going to stop doing updates to the house? Ha! Does this mean I’m going to pay $400 to get the chair for the office reupholstered? Yeah, I’ll be passing on that one.
My first budget-friendly redesign will be the office. Sure, my original plan will be altered a bit – but I think I can get the same look for cheap. How cheap? My goal is $150 total. I’ve spent $30 on the paint, so I have $120 left to go.
I think this is possible for several reasons:
1. I was originally planning on using the same key pieces anyway
2. I love a good bargain and rarely splurge on home décor items
So the new plan for the office armchair that’s no longer being reupholstered? It’s been sent to the man cave, where Brent is thrilled to have an armchair and ottoman to relax on. The former khaki ottoman that was down there has been brought up to the office where throw pillows will accessorize it.
I have $120 left, and I am determined to make it work.
Wednesday, February 24, 2010
The Upstairs – Chapter 5 (Art for the office)
My recent projects have been making art for the office and catching up on sleep. Both have been equally entertaining.
I have always loved this painting that I did:
I call it "The Amazing Things You Can Do With Painter's Tape." :)
In the old house it was in the living room, and in this house I really wanted it above the fireplace, but it was too big...literally. Because I still wanted it in the house somewhere, I decided to switch some colors to make it work in the office.
This isn't the first time I've altered this painting, or in fact any painting I've done. In fact, probably the majority of them have received a color change here or there. This is a great way to get customized art on the oh-so-important budget. Just be patient though, because doing color changes is really boring stuff.
So boring, this was Macintosh while I was painting:
After 2 evenings of glamorous paint touch-ups, it's done:
If you are interested in making something like this, how's how:
- Paint the entire canvas black (or whatever color you want the lines to be)
- Use painter's tape (remember, use a name brand like Scotch or Frog), to determine the square sizes
- Paint various colors into the squares
- Once dry, peel the tape off
- Use more tape for any touch ups you have
As for supplies, I go cheap on both paint and brushes. I use the Americana paint you get for $.99 at craft stores. As for brushes, I like the cheap value packs at Hobby Lobby a lot better than at Michaels. Several of my Hobby Lobby cheap-o brushes I've had since high school, where with the Michaels' brushes, I'm lucky if they last a week.
My favorite is the 25-pack Hobby lobby carries for $6.99:
Happy painting! If anyone ends up doing this painting, I would love to see it. :)
Tuesday, February 23, 2010
Pillow Power
I saw this pillow, feel in love and bought two. Yep, this will definitely work for my living room. I found them on Etsy for $16 each from nestable. Seriously, how can you beat that? Whether they'll end up on the sofa or the chairs is my only debate.
Sunday, February 21, 2010
Rate My Space
I thought it was time. I finally uploaded my first set of pictures to Rate My Space. Granted, I'm not completely done with this room (throw pillows), but I figured why not? So far, everyone is being nice enough.
So, if you're a RMS fan, please check it out – I'm something_classic.
The Upstairs – Chapter 4 (the office closet)
Well, my plan of switching the office and the third bedroom is finally coming together. This weekend Brent and I focused on organization – especially the dreaded office closet.
Before:
After:
I'm excited to say that I didn't spend anything on this closet update. All the ClosetMaid gadgets in the closet now, were things I've had. I started collecting ClosetMaid accessories in college, and haven't looked back since.
My favorite part of the closet is using the shoe rack for a paper organizer.
The paper-obsessed graphic designer in me, thought it was a must to organize my Neenah paper not only by style but paper weight.
I want the office to be a room I enjoy going in to, not a place the stresses me out – and a clean and organized closet is a key part to that.
Labels:
before and afters,
house #2,
organization
Thursday, February 18, 2010
I have art!
There are no words, other than I'm in love. I just need to find some throw pillows and then this room is done. :)
Before:
After:
Before:
After:
Labels:
before and afters,
house #2,
modern-glam
Wednesday, February 17, 2010
My $16.12 project
We got this three-drawer cart for free. Yes, at one point it had wheels, which was just a bad idea. (Think of heavy drawers when opened, tipping the cart over with a printer on top, which then all falls onto me. Yes, that really did happen, and yes, it was terrifying. People wonder how I acquire so many bruises, well now you know – my furniture attacks me).
I'm embarrassed to say this item almost didn't even make it on the move with us. Even after the killer wheels were off the piece, I just wasn't crazy about it. But it did, and it quickly got stuffed into the office closet...until it made its debut tonight in the new office with new hardware.
Not bad at all for $16.12. :)
The Upstairs – Chapter 3 (The office floors)
Last nights accomplishments:
- The carpet was be ripped out, as well as all staples and tack strip
- The top part of the baseboard has been painted
The current project right now is the quarter round. Brent is doing the measuring, hammering and cursing (seriously, you should have heard him last night), and I'm doing the quarter round painting and the touch ups once hammered in.
One wall down, three more to go.
Before:
After:-----------------------------------------
Oh, and thank you Mrs. Messi's Musings for the Beautiful Blogger Award.
Labels:
before and afters,
brent's projects,
DIY,
house #2,
paint power
Monday, February 15, 2010
The Upstairs – Chapter 2 (The office)
Meet the future office:
Yep, this is currently the room of crap (or as Brent calls it "the R.O.C.") I'd like to say the current office won't be subjected to this madness, but that would be a lie.
I'm thrilled with the progress made in the future office this weekend though – all painting aside from touch ups are done. This is huge. I was beyond terrified about doing the stripes, but it really wasn't too bad (details are further below).
The paint colors I picked were by Glidden (thank you Home Depot for the $15 gallon sale) – Whispering Wheat (the base color) and Soft Suede (the darker color). I've only used Glidden once before, and that was on the buffet, but once again I was really happy with the paint quality.
Once the base color was on, the measurement fun began. This was definitely a trial-and-error process, and for Brent and myself, third time was the charm.
------------------------------------------------------
Measurements: Round 1
My logic was use the level for each stripe for about a foot, and then use the laser level from there and then it's nothing but tracing the red line. (While looking back, I'm fairly positive this actually did work, but we thought we were really off because the top stripe kept getting larger).
Measurements: Round 2
We decided to measure up from the baseboard for all measurements every foot or so. While this also made a lot of sense at the time, we weren't planning on the unevenness of the baseboards. So, 23 inches was definitely not 23 inches in all places. This would lead to lines going slightly diagonal, which would look terrible once furniture was added.
Measurements: Round 3
What we should have done all along – just measure in one corner – and then use the level just based on that. The baseboards and ceilings may not be perfect, but this way we know our lines are straight. Brent did all the measuring, and it took him about 30 minutes to do the entire room. (How did it get done so quickly? Brent has a beast of a level that's about 3-feet long).
------------------------------------------------------
So while the laser theory would have worked looking back, I'm happy we did it all with the actual level. Why? Because with those pencil lines I knew exactly where to put my tape, versus the sketchy lines I was making from tracing the laser line.
I did debate awhile about the stripe itself – small or big. I love the smaller stripes like Michelle from Three Men and a Lady has in her entryway, but after much debate, I realized that wasn't me. I decided my stripe philosophy was go big or go home.
I'm so happy I went big, I love how it looks:
Paint Tip: I don't go name-brand that often for paint supplies, but painter's tape is something you cannot cheap out on. There is a major difference between the $7 and $1 tape. So don't do it, because you will regret it.
Up next: removing the carpet.
Labels:
brent's projects,
DIY,
house #2,
paint power
Saturday, February 13, 2010
The office vision
This was my first time using Polyvore, and let's just say I'll probably go back to InDesign after this. My issue is that I already own some key pieces...that no longer exists at stores...and Polyvore hates Snapfish. So, I was slightly at a loss and had to bluff a couple of things, but you can still get the picture.
Anyway, here's the plan.
1. I want to keep the colors simple, so I can do the horizontal stripes. I'm between several different shades – but it looks like Glidden paint is the winner.
2. To play off the glass desk, I thought glass candleholders were a must. These candleholders are from CB2. The candleholders I already have are also from CB2, but have more geometric detail to them. Just a warning though, all their lumi collection is really thin, so be super careful. I have no idea how mine are still in one piece.
3. Some white magazine holders from The Container Store will help hide the clutter.
4. This isn't my exact desk lamp, I think mine is actually cooler. It was another Craigslist find, and I got it for $25. Compare that to this lamp for $300.
5. I am all about the DIY art. And while I think the piece I selected is beautiful, I'm sure the price tag isn't. I am actually going to alter a piece I had in the family room in house #1. This painting will lose the greens and yellow, and add the new current color scheme.
6. To show off the red, I want to add in plenty of red accessories, such as vases. This vase is from Ikea and is $7.99. I wish I lived by an Ikea, my life would be so much easier.
7. Seriously, if you do not own this bookshelf from Crate & Barrel – go buy it. Why is it so awesome? It can be either a bookshelf or console table. For a mind changer like me, this is heaven.
8. Oh, the chair. Sigh. I wish I could afford it, but even with it's $979 sale price, it's just not in my future. So what's the plan? Last June, I got an armchair and ottoman off Craigslist for $35. While the chair is brown – I'm not a fan of the pattern, just the shape. My goal is to have this chair upholstered with a similiar fabric to dream chair.
9. I already own these floating shelves from Lowes. They are actually the same ones I have in the living room now, but just in a smaller size.
10. I have a crush on this pillow. I figure everything else is more structured – so the pattern adds a fun twist to the room.
11. The desk is from Target and is listed for $129.99. I scored this piece brand new on Craigslist (seeing a trend here?) for $50 last year. I know not everyone wants to glass desk, but I don't want my desk to stand out – and a glass desk is ideal in those situations. Why the L-shape? Brent's a CPA and needs room for his 10 key and giant calculator (I wish I was joking).
12. The chair is something Brent will always win on. He's the one who actually uses the desk – so his black-leather preference wins. The one we have now though is looking rather sad, so hopefully at some point an upgrade can happen.
13. While I do have this table lamp from Pier 1, what this image should be in the floor lamp version.
Friday, February 12, 2010
The Upstairs – Chapter 1
Brent and I made 2 rookie mistakes with the upstairs in September while we were moving in.
1. We painted the office the same color as the office in the old house.
While there is nothing wrong with Sherwin Williams' mocha – it definitely isn't right for this house...especially that bedroom. Not only are there fewer windows, but the house faces a different direction, which just means we have less sunlight...period. And that color just makes the bedroom even darker.
2. We weren't thinking about the future.
Putting the office where we did seemed like a good idea at the time, but now it just seems all wrong. Bedroom #3 is nothing but storage right now, which means that door stays closed. Seeing the always-closed door from the entry way isn't my favorite thing in the world. Plus, when the baby thing does happen – the current office just makes more sense as a nursery. From my bed, I can see into that bedroom – it just makes more sense.
The Plan
- Switch the two bedrooms
- Embrace the brown in the office, but make it a lighter brown and do horizontal stripes throughout it
- Finish all the door and trim painting in both rooms
- Rip out the carpet in the hallway and both bedrooms (and pray the hardwood floors underneath are in good condition)
Craigslist Deals in Kansas City
I love Craigslist because it's a mixture of perfectly new items and major fixer uppers – so there is something for everyone. Enjoy today's finds from Kansas City.
Pier 1 faux-leather queen size headboard – $125
Pottery Barn black swivel desk chair – $199
Pottery Barn desk – $125
Retro bar stools – $50
Please let me know if there's a city you want me to do a Craigslist search for. :)
Pier 1 faux-leather queen size headboard – $125
Pottery Barn black swivel desk chair – $199
Pottery Barn desk – $125
Retro bar stools – $50
Please let me know if there's a city you want me to do a Craigslist search for. :)
Labels:
craigslist/garage sales,
deals
Thursday, February 11, 2010
Happy 101 Award
Thank you so much Pine Tree Home for passing along the Happy 101 Award to me. I love that people are enjoying my new-home adventures blog.
So here are my 10 things that make me happy:
1. My husband
2. My dogs
3. My new house
4. Wine Country
5. Bargains (sales, Craigslist, eBay, garage sale, deals of the day – I’m not picky)
6. My Kate Spade purse
7. Houndstooth
8. Walk-in closets (and I very jealous of everyone with these)
9. Mexican food (I think I could live off tacos and queso)
10. Getting comments on my blog. Thanks so much for tuning in. ☺
And here are my 10 blogs of choice:
1. 3 Men and a Lady
Michelle is amazing – if you haven’t already heard of you (in which case you are probably living under a rock), please check out her blog.
2. A Penny Saved
Britt is the yardsale queen. I love looking at all the amazing things she gets for dirt cheap.
3. Completely Coastal
This blog makes me want to move to Nantucket…or at least acquire a beach house. This blog is my sweet escape.
4. DIY Diaries
Leslie has a beautiful home. She keeps me motivated to keep on chugging along with my house.
5. Dog Photographer – Leesia Teh
I’m so jealous of everyone who gets to use Lessia. She has amazing talent – I wish she was located in KC.
6. Foreclosure to Fabulous
Holes in the walls and bad electrical wiring are nothing that Kari can’t handle.
7. Lovely Listing – Odd Finds in Real Estate
If you’re ever curious how not to stage your house – please look here.
8. My Happy House
This blog is my inspiration for making things clean and orderly. Well, mainly I read it, wonder how she does all that and then go home and do anything but clean…but you get the idea.
9. Pugs Not Drugs
Rose is all about rescuing dogs, organizing and shopping at HomeGoods – honestly, what’s not to like?
10. Sunshine & Wine
I love Suzanne’s go, go, go attitude. Every time I check her blog she is always doing something new to her house.
Silhouette Knockoffs
When I bought the shelves for the living room last Friday, I had a pretty good idea of what I wanted to go on them. One must was a Westie silhouette picture – to embrace my black and white theme to the fullest.
Fast forward to today, and I noticed one on OKL's vendors is selling this:
Compare that to what I made in about 5 minutes for free:
Sure mine isn't a silk screen, but I'm pretty sure that I still win. :)
What I did for free art:
1. Searched Google images for Westie silhouette images
2. Put the file into Illustrator
3. Do a "live trace" – this also allows you to alter the image to your liking and expand it to any size necessary without distorting the image.
4. Then I added a 1-point border around the image
5. Printed it out on a standard inkjet printer
6. Then I put it in a black frame I wasn't using
And yes, if you hadn't already noticed from my bedroom – I really like silhouettes and I really like my Westies.
How I made silhouettes on canvases for the price of the canvas:
1. Searched Google images for Westie silhouette images
2. Put the file into Illustrator
3. Do a live trace (If you do not have Illustrator, just find an image of whatever you are going to silhouette the size you need it to be – it doesn't have to be exact)
4. Print it out and cut out the image
5. Trace the image onto a thicker piece of cardstock
6. Once the image is traced, this is where you can alter the image (I altered my image to look more like my dogs)
7. Cut out the cardstock image
8. Paint the canvas(es) the desired color
9. Trace the cardstock image onto the canvas and then paint it
10. If you want a border, use painters tape
A little bit of everything
And let the randomness begin!
1. The trim in the dining room and living room is now done. I am slowly getting somewhere – although no more progress on the doors has been made.
2. If you were wondering where the old rug in the living room went – it's now in the family room. So the set up is how it was in house #1.
3. Where'd I get my zebra rug? I got it on eBay for $110 from bidonrugs. Not too shabby at all, plus it was free shipping. This is the second rug I have gotten on eBay, and I've had a fabulous experience with both vendors.
4. Thank you PineTreeHome for passing along the Happy Award to me. I will get to my tasks soon.
5. Brent has finally agreed the carpet in the office needs to go!!! This is huge and awesome.
Tuesday, February 9, 2010
A lot of zebra
Working with zebra print overwhelms me – I love it, and yet I'm terrified of it.
I wanted to step outside of my safe, little design box, and do something bold and daring. And well, a huge, zebra print rug in my modern-glam living room definitely accomplishes that goal.
I'm happy with the new look, but I'll be honest, it's going to take awhile to get used to without me thinking "wow, that's a lot of zebra" every time I walk into the room. Plus, I think once I get some black and white pillows for the chairs and my painting is done, some of the pressure will be off of the rug.
Before:
After:
Labels:
house #2,
modern-glam,
what I bought
Monday, February 8, 2010
"Sarah's House"
Does anyone else watch "Sarah's House?" I just stumbled upon this HGTV show several weeks ago, but I am already in love.
It's about designer Sarah Richardson, who buys a total fixer upper, and renovates it one room at a time.
She is incredible. Here's are a few of my favorites:
I want this laundry room!
It's about designer Sarah Richardson, who buys a total fixer upper, and renovates it one room at a time.
She is incredible. Here's are a few of my favorites:
I want this laundry room!
Subscribe to:
Posts (Atom)