While I'm a judgmental snob when it comes to those in "new construction houses," there is one aspect of new houses that I'm insanely jealous of – the master bedroom closets. I wish Brent and I had any form of a walk-in closet in our bedroom. Instead, we have this:
Yep, that's all the clothing space we have.
To make due, I also took over the closet in the second guest bedroom.
But, since that's Audrey's future room – something had to be done. So we cleared out our closet and got to work.
Brent had tons of board leftover from the built-ins in the man cave, so I figured why not get creative. We divided our closet in half, and each drew out a game plan of what type of storage we needed. Brent wanted a special section for his suites and some shoe storage, but maintaining room for other clothes was important to him. I went the opposite route and actually cut the clothing part of my closet in half. This way I had plenty of room for shoes, purses and other things. While it will definitely be different switching out close each season, that's what worked best for me.
Brent and had shelves built and installed in no time.
Then we got to buy/paint one of the few items we needed for this project – edging.
Much better.
The best part – my things now fit in this closet. Yay!
Sure it's not a walk-in closet, but I will survive. And now this means Audrey's closet is ready to be started.
Friday, October 28, 2011
Monday, October 24, 2011
Argyle accomplished!
It's done! The argyle wall is done!
Honestly, I'm still in a state of shock that I was able to finish it as quickly as I did. I started painting that wall white 3 weeks ago, and from there just worked on the wall off and on. Totally worth it:
Sorry, for the darkish photo. I finished all the touch-ups late last night – so this room was kind of on the dark side. I plan on taking new photos, once phase 2 of the wall is complete (but more on that later).
Here's how we made argyle happen.
1. Paint your wall your base color – this would be the color used the most. For the sack of your sanity, also have this color be the lightest color you're using.
2. Figure out how many diamonds you want (I wanted mine big, so I picked 5x8) and then make a grid. This goes super fast if you have one of those long levels. Brent measured/drew everything out in 5 minutes.
3. Now it's time to make some diamonds! Brent measured the size of one of the rectangles, and then divided the width and height in half. With those measurements he made a "mini rectangle template" on a sheet of computer paper, which was the fourth of the size of the ones on the wall. With that template, he was able to mark the halfway point in each rectangle (aka: where the diamond points go).
4. Start taping for color #2 (color #1 is your base color).
5. Paint color #2.
6. Peel tape and start taping for color #3.
7. Paint color #3.
8. Now it's time for some dashed line "fun." This was the part of the project I was dreading, but Brent and I found a way to cheat the system and make this task go by fast. Brent and I had some 6-foot edging for our closet project that was .75" in width. So, using the pencil intersections in the white diamonds as our guides – Brent held the piece of wood to the wall, while I taped everything off. For the length or each dashed line, I actually just used the length of a paint chip, that way I wouldn't have to measure anything.
9. Do touch-ups and then you're done!
I'm so happy with how it turned out. I'm especially happy that it's done, and I can move on to other projects like the nursery closet and turning the "door" on the argyle wall into a feature instead of an eyesore.
Labels:
brent's projects,
DIY,
nursery,
paint power
Monday, October 17, 2011
This weekend
Nesting is a funny thing. For me, it's like drinking a lot of Red Bull and having an extreme amount of focus on the tasks at hand. All I wanted to do this weekend was start getting things ready for Audrey, and that's exactly what we did.
What I worked on this weekend:
That's right, aside from touch ups – the argyle wall is now done. A lot of touch-up work will be needed (thanks to my husband making his pencil lines as dark as possible), but I hope to do all touch ups next weekend.
What Brent worked on this weekend:
Yep, what you're seeing is not only a super gross closet, but Brent's and my super gross closet. I'd been wanting an organizational system in our closet for awhile, and I figured this was the perfect time to make it happen. The paint finished drying over night, so hopefully our clothes will be back hanging tonight, and ready for a reveal soon!
In other Audrey news: We're buying our glider and finishing off our registry tonight. I'm so excited!
Labels:
brent's projects,
nursery,
paint power,
pregnancy
The nursery palette
While I toyed around with many color schemes, I kept coming back to this one – green, yellow, gray and white. I love the playfulness of these color together, and I love even more that it doesn't scream baby. Because this is the most gender-neutral palette ever, I decided to add in pops of magenta throughout the room, with some black to help balance out the pink.
The argyle wall though will stick with only the dominate colors, which we narrowed down to Behr's Japanese Fern and Sun Shower (the yellow on the right).
As for the gray, we'll be sticking with the gray used elsewhere in our house – Valspar's Granite Dust.
It fills good to be finally making some decisions.
Wednesday, October 12, 2011
Going white
My second guest bedroom used to look like this:
Well, it's not so welcoming anymore. Audrey is taking over.
My first nursery project involved painting the focal wall white. And let me tell you, it was the weirdest experience ever. I never thought I would ever paint a wall white. I kept reminding myself, that eventually it'd be an argyle wall, but it was still just odd.
But it was definitiely nice to finally make some sort of progress in the future nursery.
Friday, October 7, 2011
I spy...
...new penguin ornaments at Crate & Barrel!
Wooly Winter Sport Penguin Ornaments:
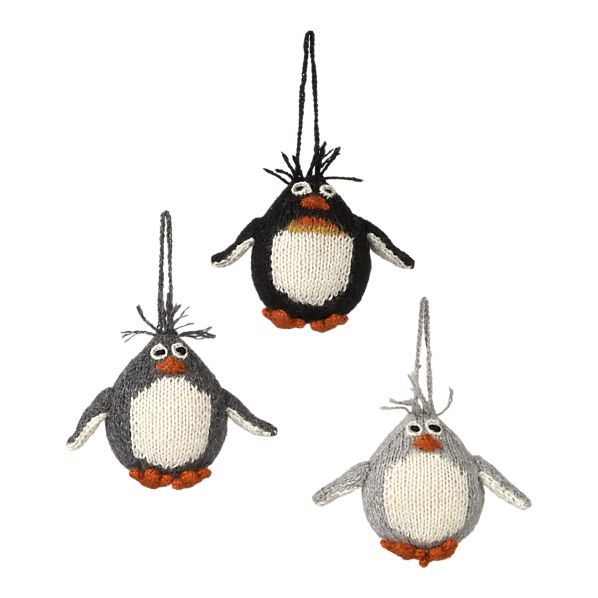
Alpaca Chubby Penguin Ornaments:
These will be fabulous additions to my penguin tree. I especially love the sporty penguins. I think I might have to get all 3 of those. :)
Wooly Winter Sport Penguin Ornaments:
Alpaca Chubby Penguin Ornaments:
These will be fabulous additions to my penguin tree. I especially love the sporty penguins. I think I might have to get all 3 of those. :)
Subscribe to:
Posts (Atom)